Creating a multi-audit project is essential for auditing professionals who perform a series of audits for the same client. With the A11y Toolbox, you’re able to have as many audits within the same project as you’d like – and you’re even able to import your results from earlier audits to give yourself a head start on audits later on.
Read the tutorial below to learn how to create a multi-audit project.
Create Your Project
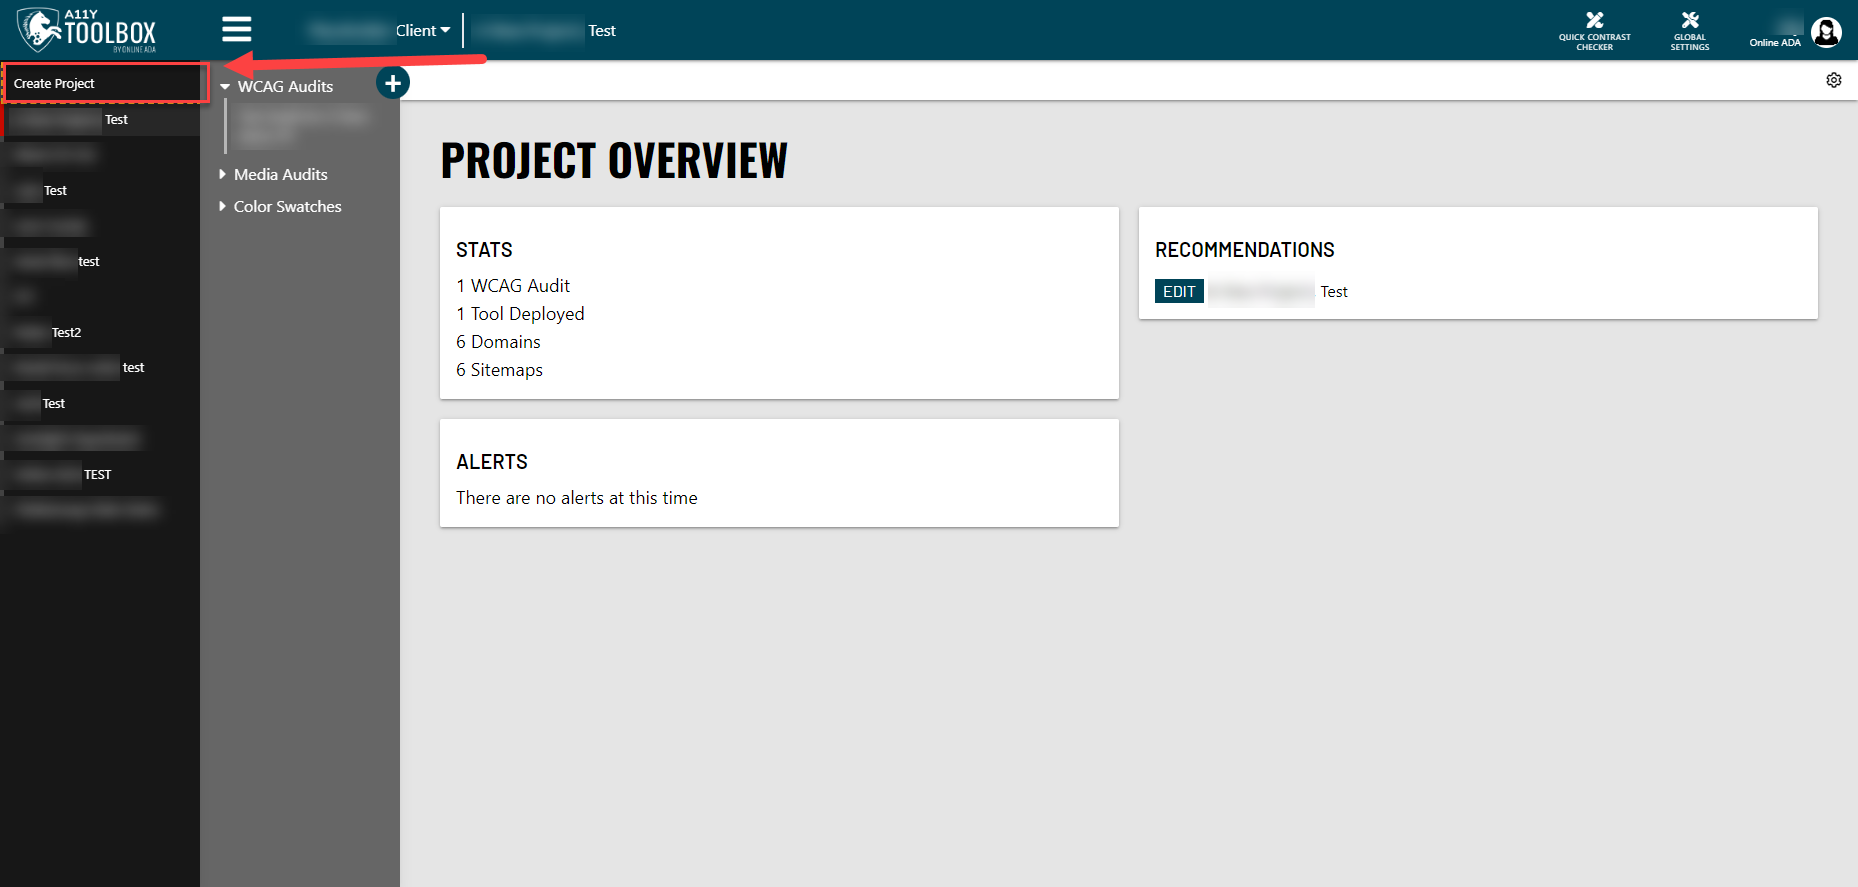
The first step to creating a multi-audit project is to create the project itself. After you have your client selected, click on the main hamburger menu at the top of the page and select the “Create Project” button at the top of your project list. Follow the prompts in the pop up window.
Create an Audit
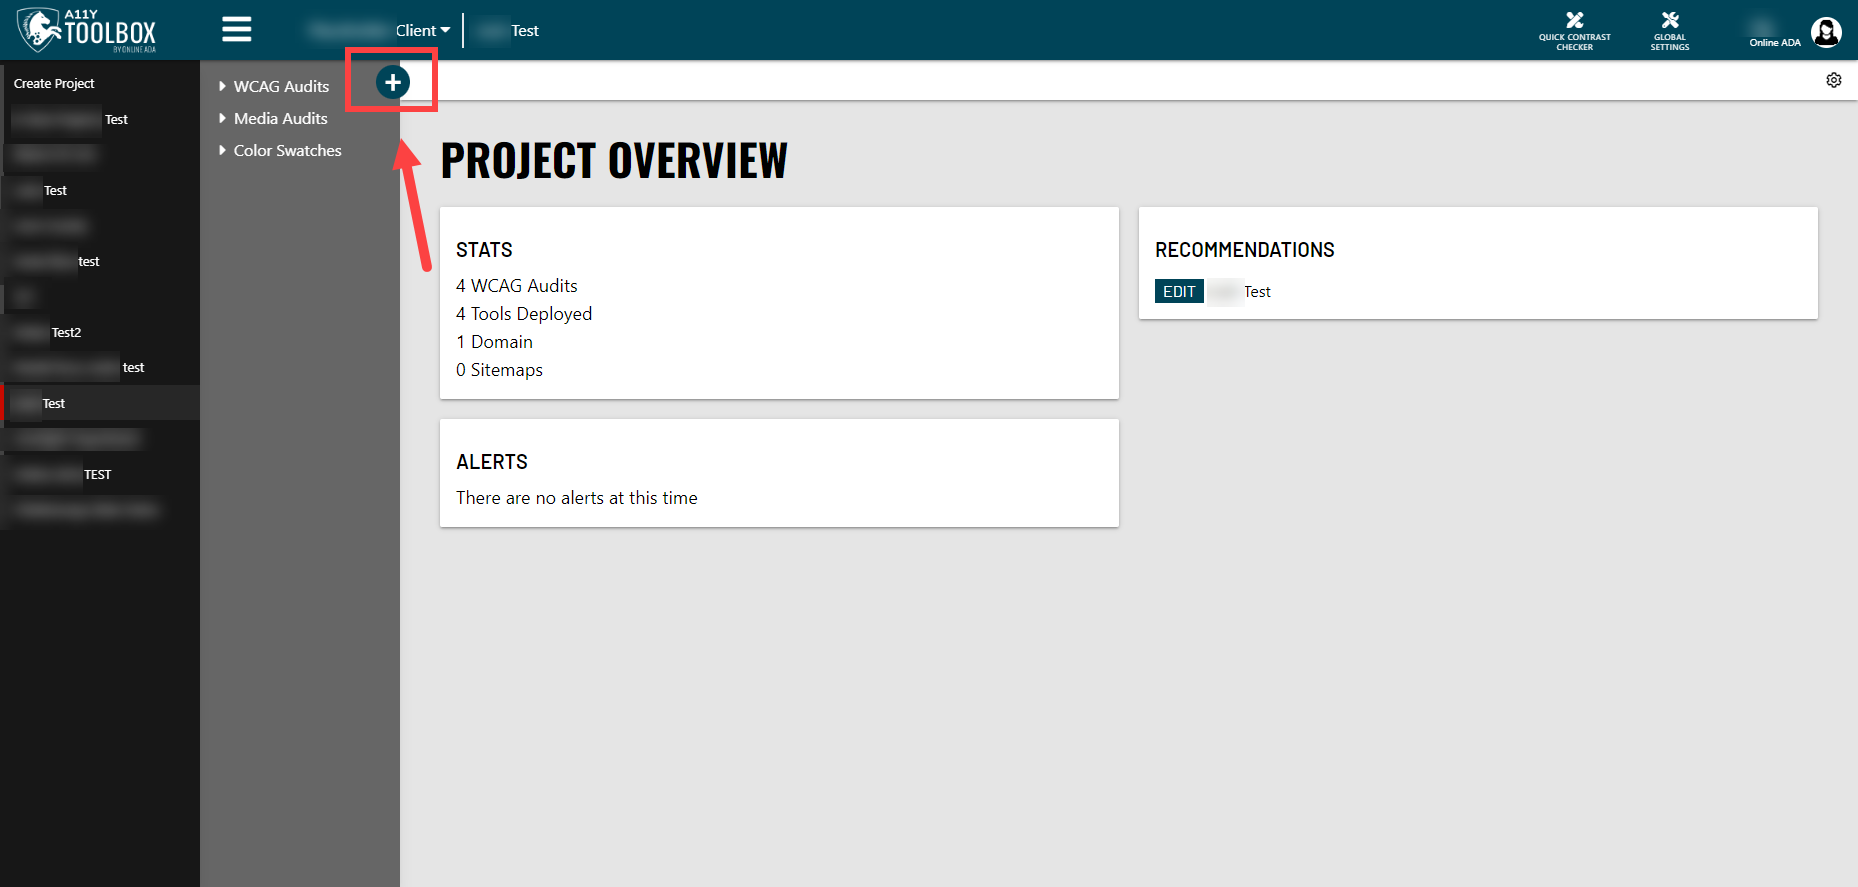
Once you’ve created your project, you will see a second menu appear with all the tools in the toolbox and any individual audits you may have. To create a new audit, select the “Deploy a Tool” button that shows a plus icon at the top of this second menu. Follow the prompts in the pop-up window to set up your new audit.
Import Prior Audit Results
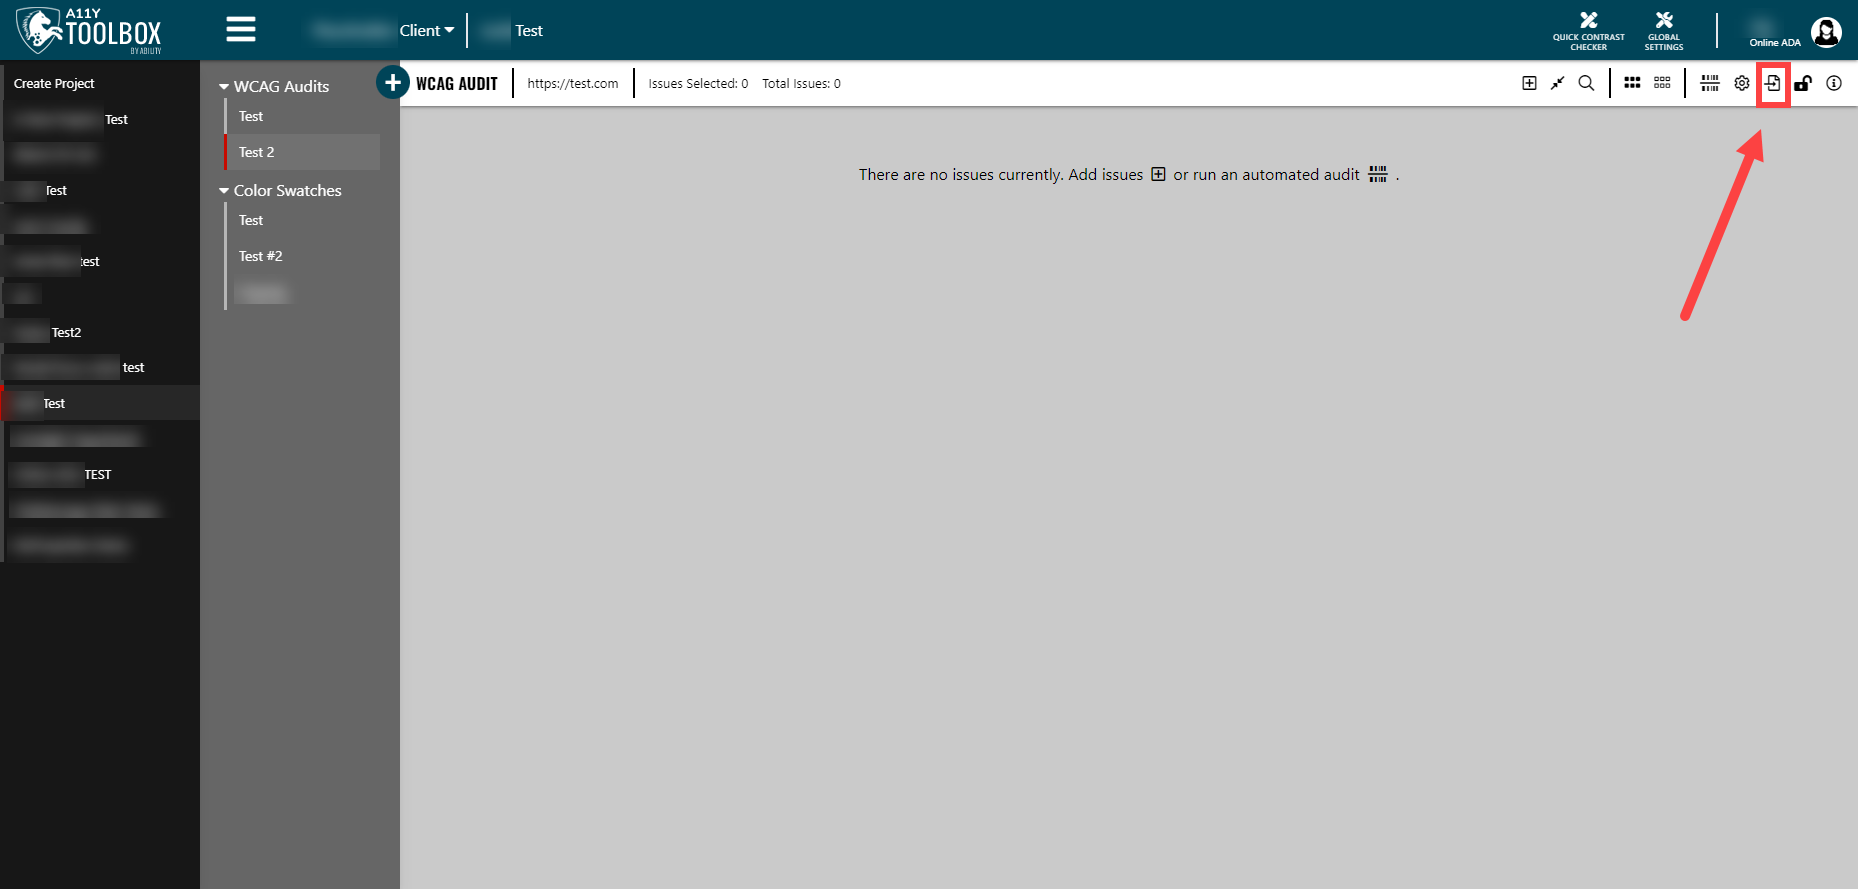
If this is your second audit, you’ll have the ability to import the issues/results from your first audit into your second. To do this, go to the audit customizing options menu at the top of the audit. Here, you will see an “Import Issues to this Audit” button. Make sure to also select which specific issues you want to import from the audit preview that appears below, then select the “Finish and Go to Audit” button at the bottom of the page.
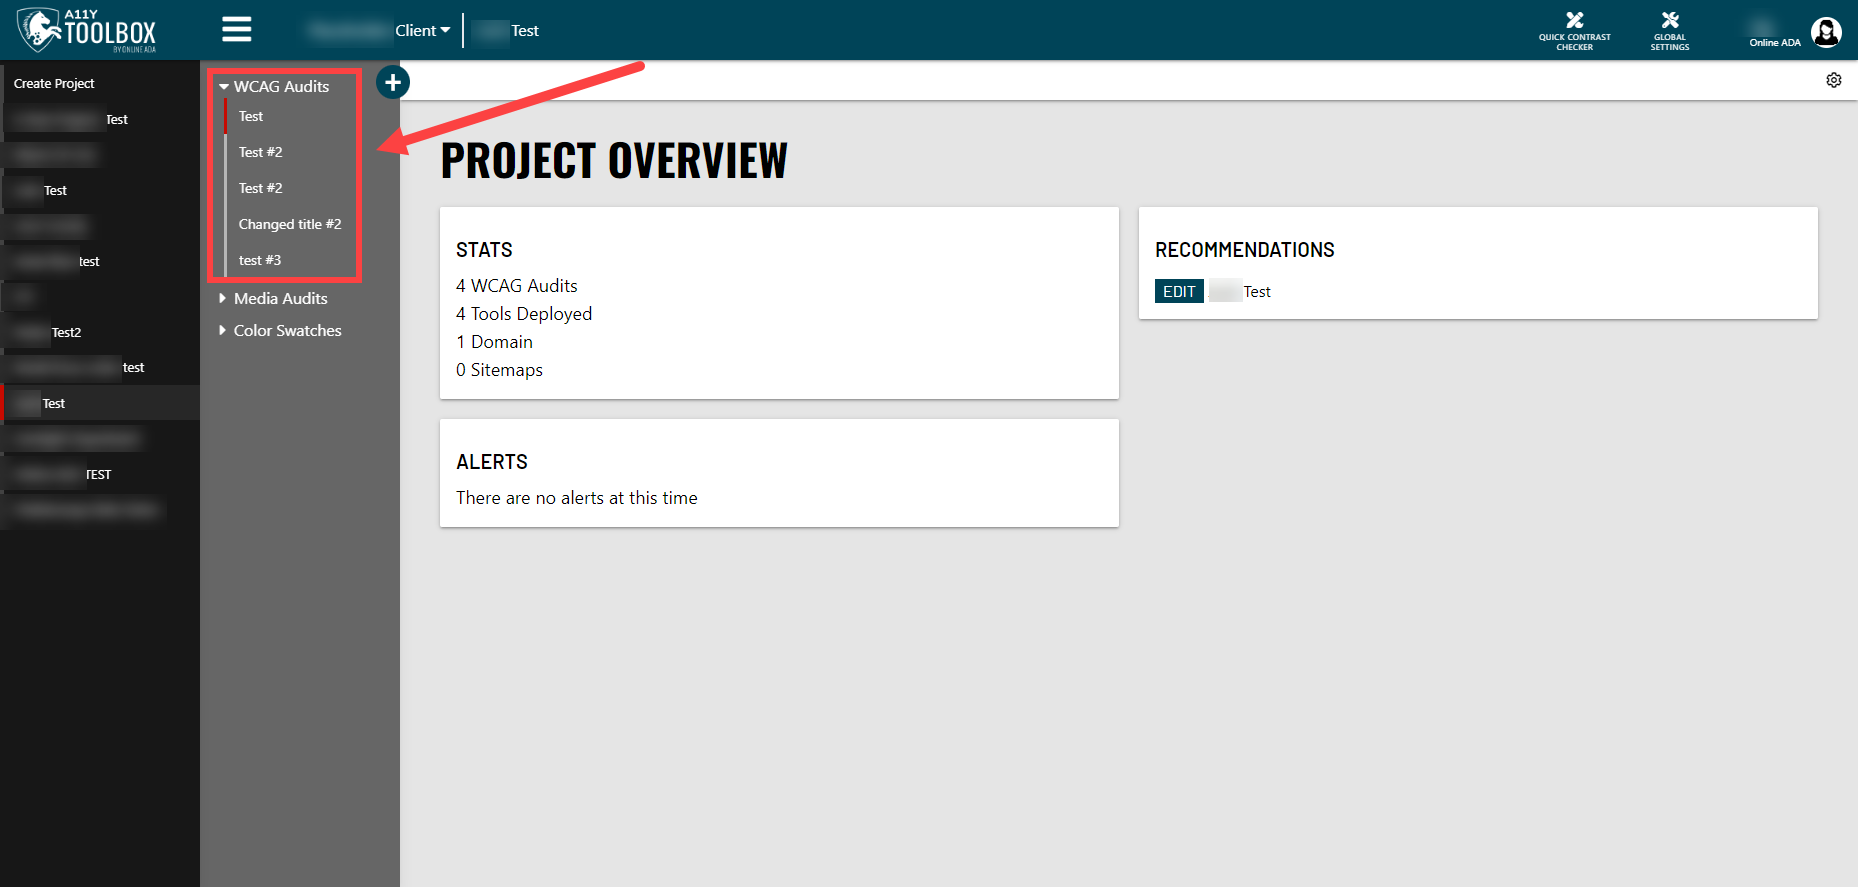
Once you have created multiple audits, you’ll see all of your audits displayed under the “WCAG Audits” portion of the main menu and nested under your project’s name.